Kitchen notes · a little help before you start
No Bake Pumpkin Pie Bars
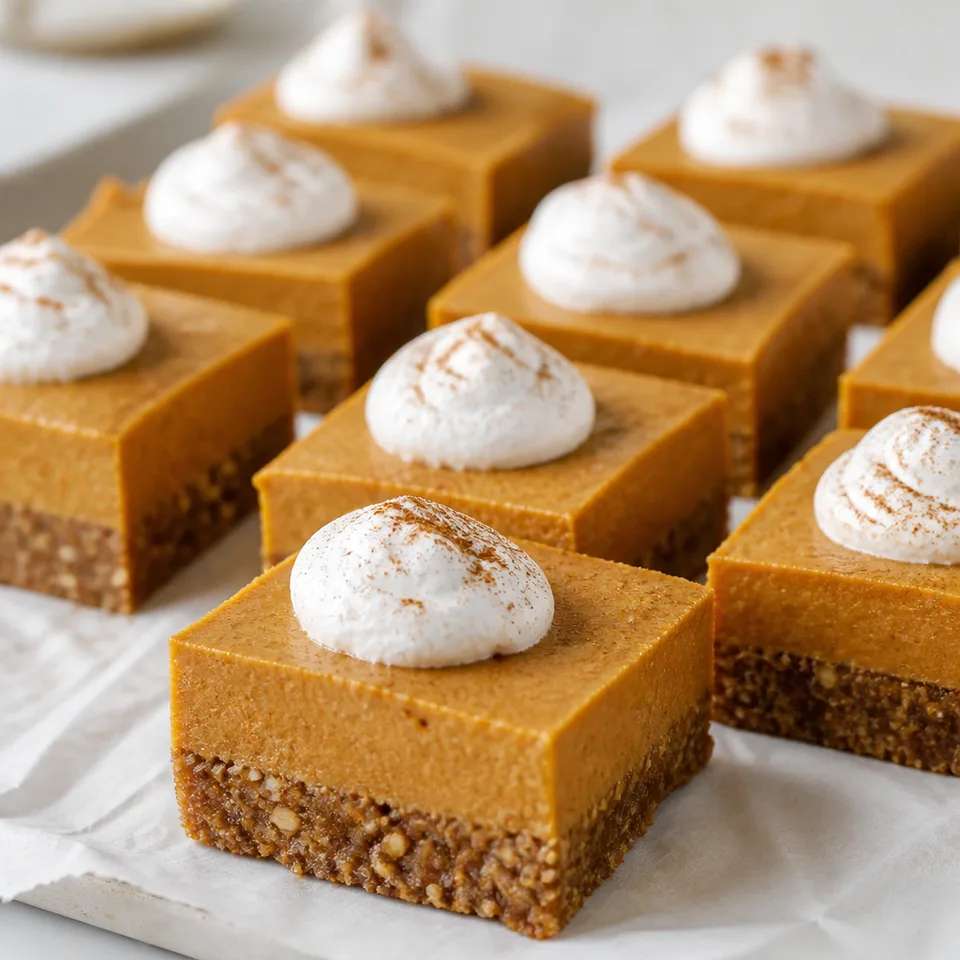
No Bake Pumpkin Pie Bars is made with canned pumpkin or homemade pumpkin puree, pumpkin pie spice, and granola*.
- Prep
- 15 min
- Total
- 255 min
- Original yield
- Serves 12
- Ingredients
- 11 listed
Make it part of your week
Recipe categories & planning details
- Meal type
- Desserts
- Cuisine
- American
- Preparation & total time
- Prep: 15 minutes or less · Total: over 60 minutes
A few quick notes
1. Follow the blending step
Prepare the blending equipment before that stage of the recipe.
2. Match the cuts in the method
Use the chopping, slicing or cutting preparation specified.
Get to know the ingredients
granola*
In the method: Add granola to a food processor and process until the granola is the size of graham cracker crumbs.
solid coconut oil
In the method: Add coconut oil and dates to the food processor and process until mixture is well combined and sticking together.
pitted medjool dates
In the method: Add coconut oil and dates to the food processor and process until mixture is well combined and sticking together.
Let’s make it
Choose your servings, then check things off as you go.
Original recipe: Serves 12. Original quantities shown.
Check ingredients as you prepare them. These checks stay on this page.
Ingredient note
Source: 3 cups granola*Ingredient note
Source: 2 Tablespoons solid coconut oilIngredient note
Source: 10 pitted medjool datesIngredient note
Source: 3 Tablespoons melted coconut oilIngredient note
Source: 6 medjool dates (pitted)Ingredient note
Source: 1 cup canned pumpkin or homemade pumpkin pureeIngredient note
Source: ½ cup cashew butterIngredient note
Source: 1 teaspoon pumpkin pie spiceIngredient note
Source: ½ teaspoon vanillaIngredient note
Source: ½ teaspoon cinnamonIngredient note
Source: ⅛ teaspoon sea salt
How to make it
0 of 7 steps completeMake room for No Bake Pumpkin Pie Bars
Review ingredients in your pantry before anything is added. Meal plans use your household size; grocery-only additions use the servings selected above.
The last little job
Finish as directed
Leftovers can be stored in the fridge for up to 4 days.
A few questions you might have
What should I prepare first?
Set out the food processor and baking dish. Start with this step: Add granola to a food processor and process until the granola is the size of graham cracker crumbs.
Which preparation step should I plan for?
Prepare the blending equipment before that stage of the recipe.
What happens at the end?
Leftovers can be stored in the fridge for up to 4 days.
How do I plan the ingredient amounts?
This version serves 12. Use the ingredient amounts listed for that yield. If you change the number of portions, check equipment and the full method as well as the shopping quantities.
Additional recipe notes
I tested the recipe with 3 different varieties of granola and the crust held together each time. I found the Purely Elizabeth granola worked best. If your crust seems dry and doesn’t seem to be holding together well, add another 1-2 Tablespoons of coconut oil. The bars are fabulous on their own, but feel free to spruce them up with a dollop of store-bought or homemade coconut whipped cream .
Storage & reheating safety
For cooked, perishable leftovers, refrigerate within 2 hours (1 hour above 90°F), using shallow containers for prompt cooling. Keep the refrigerator at 40°F or below, use refrigerated leftovers within 3–4 days, and reheat hot leftovers to 165°F, checked with a food thermometer. Follow any shorter package limit.
These are general safety limits, not a tested storage or freezing recommendation for this particular dish. USDA leftovers guidance · Safe cooking temperatures
Recipe source: eatingbirdfood.com. Ingredient names and quantities may be adapted for the pantry.
Preparation notes follow the recipe shown here.