Kitchen notes · a little help before you start
Spam musubi
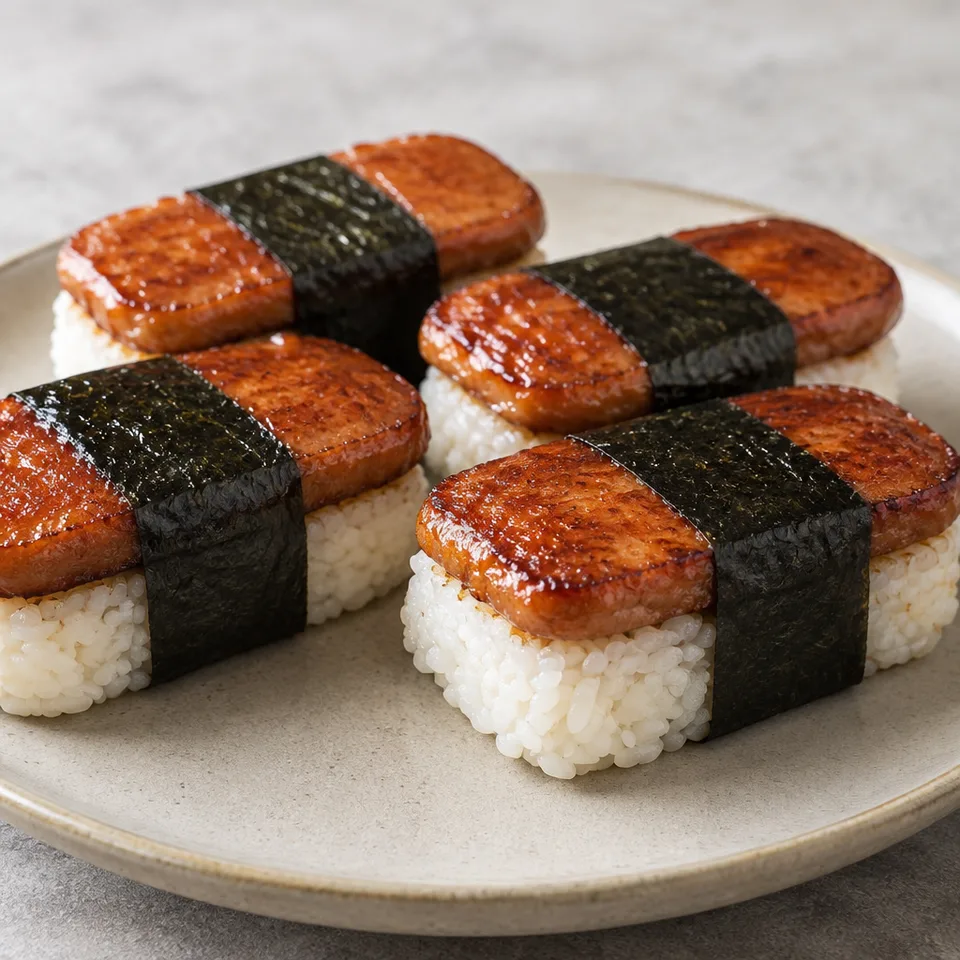
Sweet, salty Spam and a soft cushion of rice make musubi an appealing little package. The nori gives you somewhere to hold it while you take a bite. A few neatly wrapped pieces on a plate are a good reason to make something a little different today.
- Prep
- 10 min
- Cook
- 10 min
- Total
- 20 min
- Original yield
- Serves 6
- Ingredients
- 7 listed
Make it part of your week
Recipe categories & planning details
- Meal type
- Lunch · Sides
- Cuisine
- American · Japanese · Asian
- Preparation & total time
- Prep: 15 minutes or less · Total: 30 minutes or less
A few quick notes
1. Keep the can if you want neat shapes
After you slice the Spam, hang onto the empty can. Lined with cling film, it becomes a handy mould for pressing the rice and Spam into tidy musubi.
2. Let the glaze cling
Fry the Spam first until it’s turning golden, then add the soy, mirin and sugar mixture. That extra minute on each side is what coats the slices rather than just wetting them.
3. Press, but don’t squash
When the rice and Spam go into the mould, press down lightly. You want the pieces to hold together, without compacting the rice into a heavy block.
Get to know the ingredients
Spam
Slice the Spam lengthways into six pieces so each musubi gets one slice. The can is useful afterward as a mould, so don’t throw it away straight after opening.
Cooked sushi rice
Use cooked sushi rice here, not dry rice. It needs to be ready before assembly so you can spoon it into the mould and press it with the cooked Spam.
Nori
The nori sheets are cut into strips and wrapped around the middle of each musubi. That strip holds the rice and Spam together and gives you the classic finish.
Let’s make it
Choose your servings, then check things off as you go.
Original recipe: Serves 6. Original quantities shown.
Check ingredients as you prepare them. These checks stay on this page.
How to make it
0 of 5 steps completeMake room for Spam musubi
Review ingredients in your pantry before anything is added. Meal plans use your household size; grocery-only additions use the servings selected above.
The last little job
Wrap just before serving
The last little job is cutting the nori into strips and wrapping each piece around the middle. Press the strip snugly enough to hold, then serve the musubi once they’re wrapped.
A little more help as you go
A little help before you start
The rice needs to be cooked before you begin shaping. While the Spam fries, mix the soy sauce, mirin and brown sugar so the glaze is ready to pour straight into the pan.
Using a musubi mould instead
If you have a musubi mould, use that in place of the lined can. The assembly stays the same: rice in first, cooked Spam on top, then a light press before unmoulding.
A few questions you might have
Do I have to use the Spam can as a mould?
No. The can is optional, and a musubi mould works too. If you do use the can, line it with cling film first so the rice and Spam lift out cleanly.
Why is the sauce added after frying the Spam?
The Spam gets browned first, then the soy sauce, mirin and brown sugar go in for a short coating step. Adding the sauce later helps it glaze the slices after they’ve turned golden.
How many slices should I cut from the Spam?
Cut the Spam lengthways into six slices. That gives you one cooked slice for each musubi as you repeat the rice and Spam layers.
Should the Spam be hot when I shape the musubi?
Let it cool slightly after glazing. It should still be easy to handle, but not straight from the pan when you’re pressing it with the rice.
Where should the nori go?
Cut the nori sheets into strips and wrap them around the middles of the musubi. They go on after the rice and Spam have been shaped.
Storage & reheating safety
For cooked, perishable leftovers, refrigerate within 2 hours (1 hour above 90°F), using shallow containers for prompt cooling. Keep the refrigerator at 40°F or below, use refrigerated leftovers within 3–4 days, and reheat hot leftovers to 165°F, checked with a food thermometer. Follow any shorter package limit.
These are general safety limits, not a tested storage or freezing recommendation for this particular dish. USDA leftovers guidance · Safe cooking temperatures
Recipe source: bbcgoodfood.com. Ingredient names and quantities may be adapted for the pantry.
Preparation notes follow the recipe shown here.