Kitchen notes · a little help before you start
Stuffed Butternut Squash (Chicken Bacon Ranch)
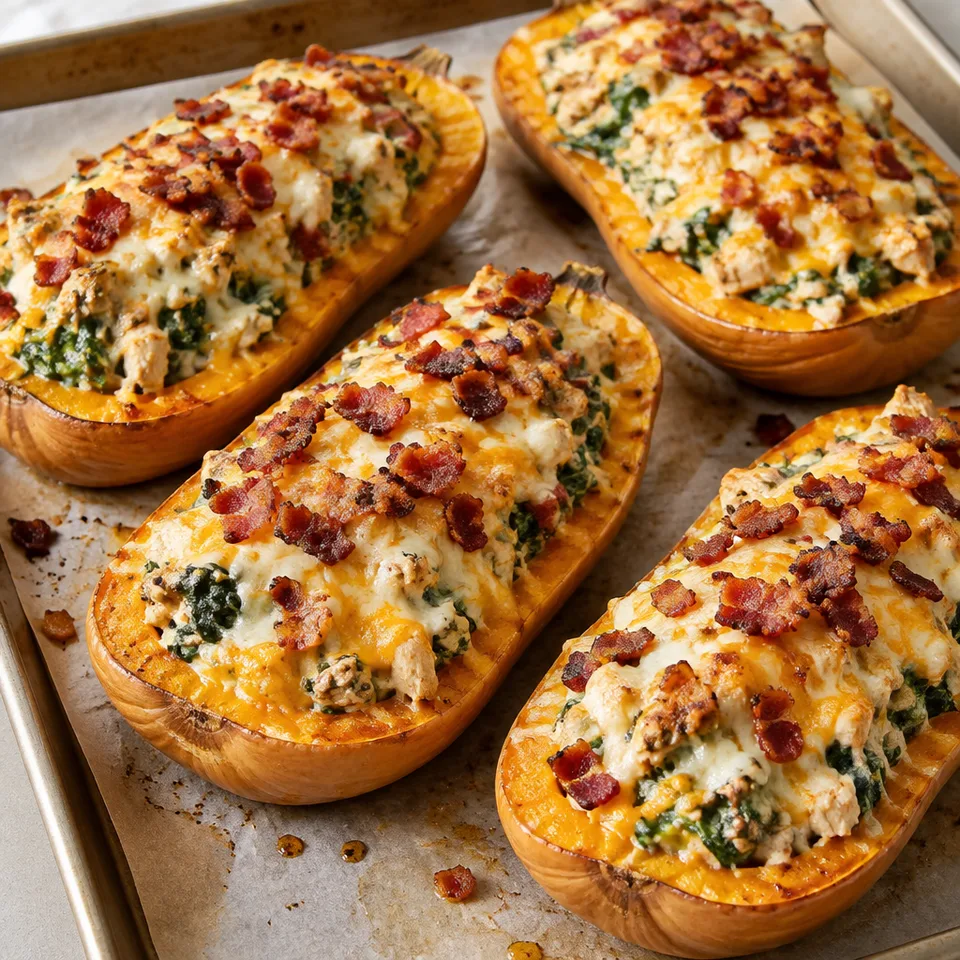
Set half a stuffed squash on your plate and dinner already feels generous. The sweet squash is a good match for the savory chicken filling, with bits of bacon to find as you go. Start at the cheesy top and work your way into the soft roasted edges.
- Prep
- 20 min
- Cook
- 40 min
- Total
- 60 min
- Original yield
- Serves 8
- Ingredients
- 11 listed
Make it part of your week
Recipe categories & planning details
- Meal type
- Main course
- Primary protein
- Chicken · Pork
- Cuisine
- American
- Cooking method
- Baking · Baked & roasted · Roasting
- Preparation & total time
- Prep: 16–30 minutes · Total: 31–60 minutes
A few quick notes
1. Check the neck for tenderness
The thick neck of the squash is the slowest part to soften, so test there with a fork before you pull it from the oven. If that part is tender, the rest is ready to stuff.
2. Start the bacon in a cold pan
Putting the bacon into a cold skillet gives it time to render as the pan warms. That leaves you with crisp bacon and enough flavorful drippings to cook the garlic and kale.
3. Make a shallow well, not a canoe
Scoop just enough roasted squash from each half to hold the filling, and keep the border intact. That little rim helps the squash keep its shape once it is piled up and baked again.
Get to know the ingredients
Butternut squash
Use medium squash in the listed size range so the halves roast through and still have room for filling. Once roasted, a small amount of the flesh gets mashed into the chicken mixture, so don't skip that scoop.
Cooked chicken
The chicken goes in already cooked, either shredded or cubed. Raw chicken would not have enough time to cook safely during the final short bake, which is only to heat the filling and melt the cheese.
Kale
Remove the tough stems and chop the kale before it hits the pan. It only needs a few minutes with the garlic, just until tender, bright green, and beginning to wilt.
Let’s make it
Choose your servings, then check things off as you go.
Original recipe: Serves 8. Original quantities shown.
Check ingredients as you prepare them. These checks stay on this page.
How to make it
0 of 11 steps completeMake room for Stuffed Butternut Squash (Chicken Bacon Ranch)
Review ingredients in your pantry before anything is added. Meal plans use your household size; grocery-only additions use the servings selected above.
The last little job
The last little job
Hold back some chopped bacon and scatter it over the stuffed squash right before serving. It keeps that final bacon topping crisp instead of letting it soften under the melted cheese.
A little more help as you go
Use the cheese in two rounds
Some cheddar and mozzarella go into the filling, and the rest goes on top before the squash returns to the oven. That gives you creamy filling and a melted cheese finish.
Mound the filling generously
The squash halves are meant to be piled high, not filled flat. Divide the chicken mixture among all four halves and mound it over the top before adding the remaining cheese.
A few questions you might have
Do I roast the squash cut side up or down?
Roast it cut side down first. After it is fork tender, flip the halves cut side up, scoop a shallow well, and add the filling.
How much squash should I scoop out?
Only scoop a little from the long neck and center of each half. Leave the 1/2-inch border called for so the squash can hold the filling without collapsing.
What happens to the squash I scoop out?
Mash the scooped squash and stir it into the chicken mixture. It helps the filling belong with the roasted squash instead of sitting on top as a separate layer.
Should all the bacon go into the filling?
No. Mix in 2/3 of the chopped bacon, then save the rest for the end. The reserved bacon goes on after baking, right before serving.
Is the final bake meant to cook the filling?
The chicken is already cooked before it goes into the bowl. The last bake heats the stuffed squash through and melts the cheddar and mozzarella on top.
Storage & reheating safety
For cooked, perishable leftovers, refrigerate within 2 hours (1 hour above 90°F), using shallow containers for prompt cooling. Keep the refrigerator at 40°F or below, use refrigerated leftovers within 3–4 days, and reheat hot leftovers to 165°F, checked with a food thermometer. Follow any shorter package limit.
These are general safety limits, not a tested storage or freezing recommendation for this particular dish. USDA leftovers guidance · Safe cooking temperatures
Recipe source: wholesomeyum.com. Ingredient names and quantities may be adapted for the pantry.
Preparation notes follow the recipe shown here.