Kitchen notes · a little help before you start
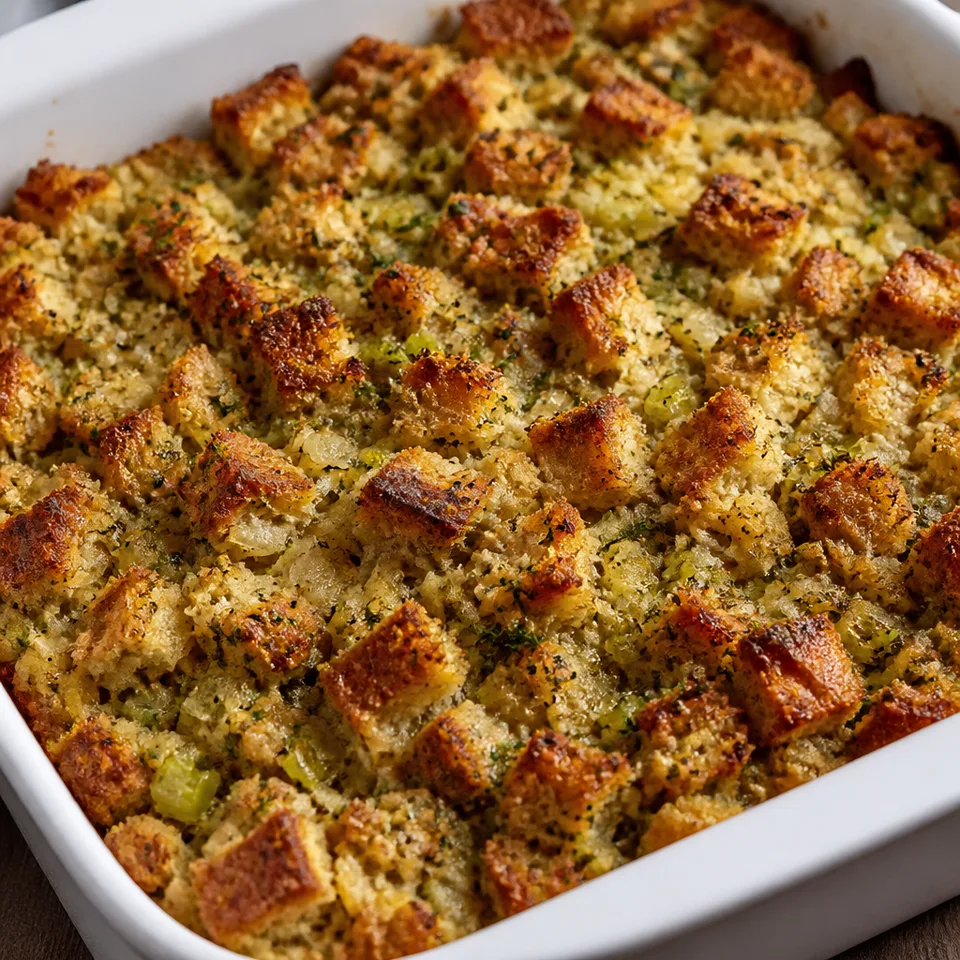
Easy Classic Stuffing Recipe
Easy Classic Stuffing Recipe is made with low sodium Chicken broth, french Bread, and celery.
- Prep
- 10 min
- Cook
- 70 min
- Total
- 80 min
- Original yield
- Serves 8
- Ingredients
- 14 listed
Make it part of your week
Recipe categories & planning details
- Meal type
- Sides
- Cuisine
- American
- Preparation & total time
- Prep: 15 minutes or less · Total: over 60 minutes
A few quick notes
1. Keep the specified layer
Arrange the food as directed and check that the pan or basket has enough space.
2. Check the off-heat addition
Follow the instruction to take the pan off the heat before the finishing addition.
3. Check when to cover
Follow the covered and uncovered stages in their stated order.
Get to know the ingredients
french Bread
In the method: Add the veggie mixture, bread, and broth.
celery (finely diced)
In the method: Melt the butter in a pan over medium to high heat, add the onions and celery and cook it down until they start to lose their moisture and become tender.
large Onion
In the method: Melt the butter in a pan over medium to high heat, add the onions and celery and cook it down until they start to lose their moisture and become tender.
Let’s make it
Choose your servings, then check things off as you go.
Original recipe: Serves 8. Original quantities shown.
Check ingredients as you prepare them. These checks stay on this page.
Ingredient note
Source: 1 lb french BreadIngredient note
Source: 1½ stick butterIngredient note
Source: 4 stalks celery (finely diced)Ingredient note
Source: 1 large OnionIngredient note
Source: 1/4 cup parsley (chopped)Ingredient note
Source: 1/4 cup sage (chopped)Ingredient note
Source: 1 tbsp Rosemary (finely minced )Ingredient note
Source: 1 tbsp fresh thyme (finely minced)Ingredient note
Source: 3 cloves garlicIngredient note
Source: 2 cups low sodium Chicken brothIngredient note
Source: 2 large EggsIngredient note
Source: 3/4 to 1 tsp salt (or to taste); upper source range endpoint used for shopping.Ingredient note
Source: 1 tsp pepper (or add to taste)Ingredient note
Required by source directions; authorized salt/pepper exception.
How to make it
0 of 15 steps completeMake room for Easy Classic Stuffing Recipe
Review ingredients in your pantry before anything is added. Meal plans use your household size; grocery-only additions use the servings selected above.
The last little job
Finish as directed
Shake up the bread cubes every once in a while so that all the cubes can be air-dried.
A little more help as you go
Check the air-fryer setup
Follow the air-fryer arrangement, settings and cooking checks in the recipe.
Allow for cooling
Include the cooling stage before the next step.
Match the cuts in the method
Use the chopping, slicing or cutting preparation specified.
A few questions you might have
What should I prepare first?
Set out the baking dish, baking sheet, oven, and air fryer. Start with this step: Melt the butter in a pan over medium to high heat, add the onions and celery and cook it down until they start to lose their moisture and become tender.
Which preparation step should I plan for?
Arrange the food as directed and check that the pan or basket has enough space.
What check should I look for as it cooks?
Melt the butter in a pan over medium to high heat, add the onions and celery and cook it down until they start to lose their moisture and become tender.
Is there another preparation step to plan for?
Follow the air-fryer arrangement, settings and cooking checks in the recipe.
Additional recipe notes
The type of butter you use will determine the quantity of salt you will add. For example, if you use salted butter, add less salt, and if you use unsalted butter, you can add a little more. If using sausage, before you add the veggies, add the sausage and brown it first before adding the veggies and aromatics. I like to use sweet onion; it contrasts nicely with the herbs. I also like to use low sodium because I can really control the amount of salt I use in that way. Butter is just more than fat; it also adds flavor, so be generous!.
Storage & reheating safety
For cooked, perishable leftovers, refrigerate within 2 hours (1 hour above 90°F), using shallow containers for prompt cooling. Keep the refrigerator at 40°F or below, use refrigerated leftovers within 3–4 days, and reheat hot leftovers to 165°F, checked with a food thermometer. Follow any shorter package limit.
These are general safety limits, not a tested storage or freezing recommendation for this particular dish. USDA leftovers guidance · Safe cooking temperatures
Recipe source: cheflolaskitchen.com. Ingredient names and quantities may be adapted for the pantry.
Preparation notes follow the recipe shown here.