Kitchen notes · a little help before you start
Glazed Apple Spiral Ham
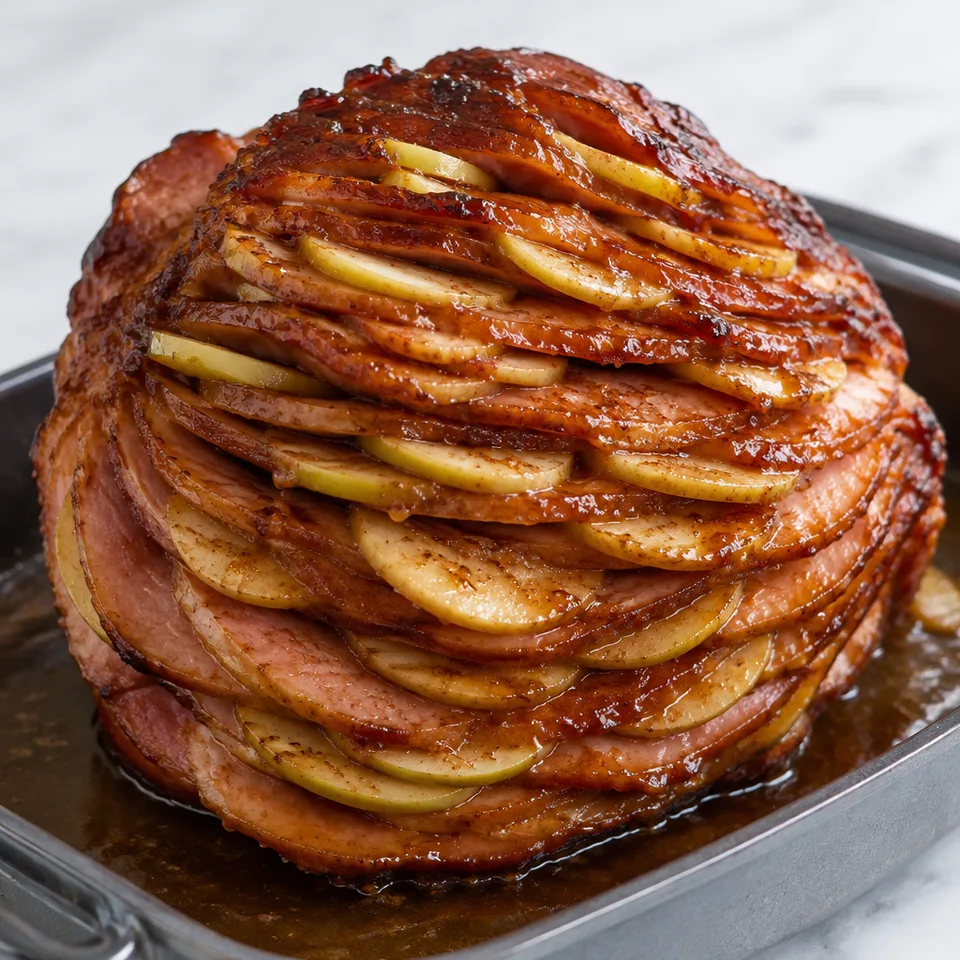
Apple slices tucked among the spirals make this glazed ham especially inviting when it's time to choose a slice. The sweet glaze has a little mustard tang beneath its warm spices. A piece with some apple nestled beside it catches the best of those flavors together.
- Prep
- 15 min
- Cook
- 105 min
- Original yield
- Serves 10
- Ingredients
- 10 listed
Make it part of your week
Recipe categories & planning details
- Meal type
- Dinner · Main course
- Primary protein
- Ham · Pork
- Cuisine
- American
- Cooking method
- Baking · Baked & roasted
- Preparation & total time
- Prep: 15 minutes or less
- Occasion
- Holidays
A few quick notes
1. Check the ham before it goes in
Look for the little plastic piece on the bottom of the ham and remove it if there is one. Skip any glaze packet too, since the apple-maple glaze is doing that job here.
2. Slice the apples really thin
The apples need to tuck into the spiral cuts, so thinner than apple pie slices is the aim. A mandolin helps if you have one, but a knife is perfectly fine.
3. Go easy while flipping
Once apples are tucked into one side, turn the ham carefully and fill the other side. If the lower slices start slipping apart, a few toothpicks can help hold everything together.
Get to know the ingredients
Use a precooked spiral ham
The ham is already cooked through, so the oven time is about warming it and caramelizing the glaze. That also means you can pull back with foil if the outside browns too fast.
Granny Smith-style apples work well
Large green apples are called for here, peeled, cored, and thinly sliced. Their shape matters as much as the variety, since the slices need to slide between the ham spirals.
Stick with Dijon
Use Dijon mustard here, not yellow mustard. It goes into the glaze with the sugar, juice, maple syrup, soy sauce, and spices, so its sharper flavor is part of the sauce.
Let’s make it
Choose your servings, then check things off as you go.
Original recipe: Serves 10. Original quantities shown.
Check ingredients as you prepare them. These checks stay on this page.
How to make it
0 of 8 steps completeMake room for Glazed Apple Spiral Ham
Review ingredients in your pantry before anything is added. Meal plans use your household size; grocery-only additions use the servings selected above.
The last little job
Let it rest before slicing
After the glaze is caramelized and the ham is warmed through, give it a proper rest before slicing. Those 20 to 30 minutes make the final carving easier and less rushed.
A little more help as you go
Keep the glaze at a gentle bubble
The glaze has plenty of sugar, so watch it once it starts boiling. A fast boil can burn it; lower the heat as needed and stop when it begins to thicken.
Use the glaze in stages
The glaze is meant to go on in three rounds: half first, then half of what remains, then the last bit. It doesn't need to be exact, just don't use it all at once.
A few questions you might have
Do I need to cook the ham all the way through?
No. Use a precooked spiral ham, so you're warming it through and building up the glaze. If it starts browning too quickly while uncovered, cover it with foil or check whether it's already done.
Can I use the glaze packet that comes with the ham?
No, discard it. This ham gets its glaze from the Dijon, brown sugar, juice, maple syrup, soy sauce, cinnamon, and cloves cooked together in the saucepan.
Why add water to the roasting pan?
The water goes into the bottom of the pan before baking to help keep the ham moist as it warms in the oven.
Can I make the apple flavor stronger?
Yes. You can use apple juice or apple cider instead of orange juice if you want the finished ham to taste more apple-forward.
How do I keep the glaze from burning?
Let it bubble gently, not aggressively, and lower the heat if needed. Later, while the ham is uncovered, cover it with foil if the glaze starts browning too quickly.
Any more cooking tips?
Storage: Let leftover ham cool completely before storing in an airtight container. Ham will keep to 5 days in the fridge or in a freezer-safe container for up to 3 months. When ready to eat, thaw overnight in the fridge. To reheat, I simply warm individual portions in the microwave for 30-second intervals, or as necessary.
Storage & reheating safety
For cooked, perishable leftovers, refrigerate within 2 hours (1 hour above 90°F), using shallow containers for prompt cooling. Keep the refrigerator at 40°F or below, use refrigerated leftovers within 3–4 days, and reheat hot leftovers to 165°F, checked with a food thermometer. Follow any shorter package limit.
These are general safety limits, not a tested storage or freezing recommendation for this particular dish. USDA leftovers guidance · Safe cooking temperatures
Recipe source: averiecooks.com. Ingredient names and quantities may be adapted for the pantry.
Preparation notes follow the recipe shown here.