Kitchen notes · a little help before you start
Baked Chicken Legs (Crispy, Easy Recipe)
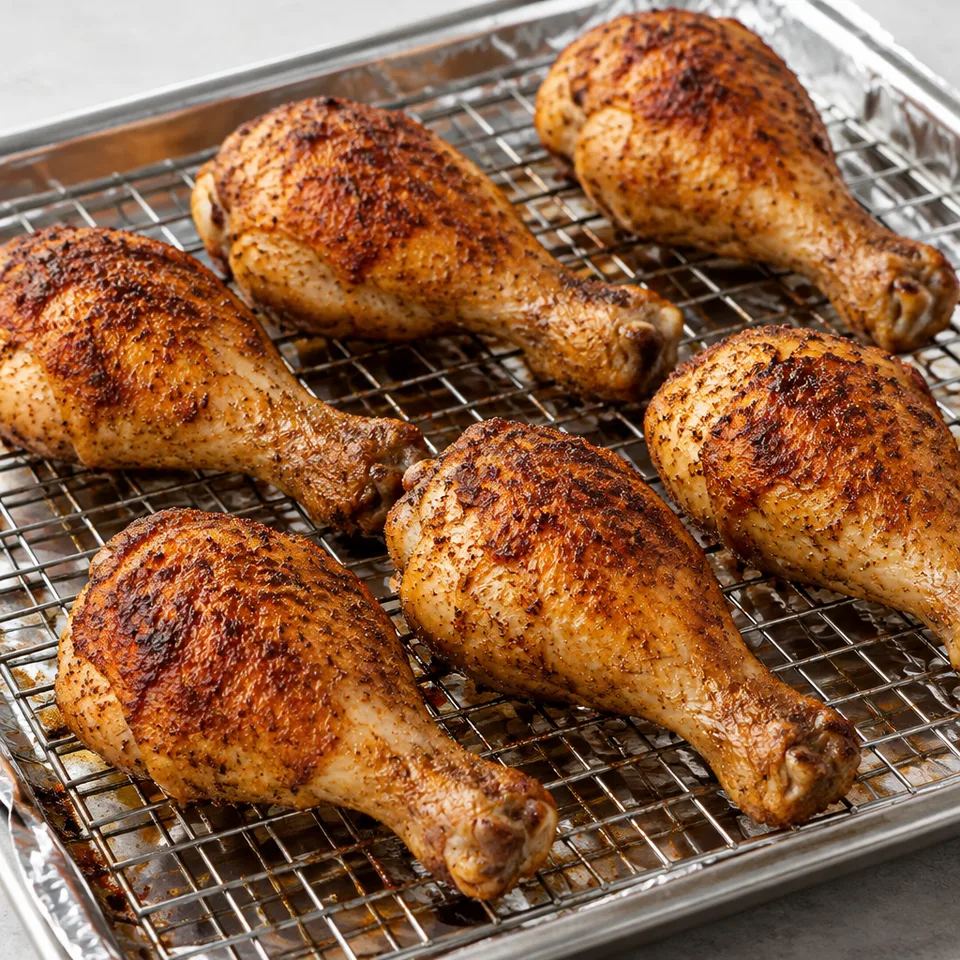
Golden chicken drumsticks with a smoky paprika coating make a dinner that's easy to anticipate. The crisp skin gives each bite a savory edge before you reach the tender meat. Choose a piece with plenty of that seasoning and enjoy it while dinner is fresh.
- Prep
- 10 min
- Cook
- 40 min
- Total
- 50 min
- Original yield
- Serves 6
- Ingredients
- 6 listed
Make it part of your week
Recipe categories & planning details
- Meal type
- Main course
- Primary protein
- Chicken
- Cuisine
- American
- Cooking method
- Baking · Baked & roasted
- Preparation & total time
- Prep: 15 minutes or less · Total: 31–60 minutes
A few quick notes
1. Use the rack if you can
Setting the drumsticks on a rack helps hot air reach the underside, so the skin has a better chance of crisping instead of sitting in juices on the pan.
2. Dry skin matters
Take a moment to pat the chicken dry before brushing on the butter. Damp skin steams first, which gets in the way of the crisp, browned finish you're after.
3. Check the thickest piece
The chicken is done when the internal temperature reaches 170 degrees F. Use the thickest drumstick as your guide, since smaller pieces may be ready sooner.
Get to know the ingredients
Chicken drumsticks
Medium drumsticks are the shape this timing is built around. Arrange them with a little space on the rack so the oven heat can move around the skin.
Melted butter
Melted butter helps the seasoning cling and encourages browning on the skin. Brush it over the drumsticks before the paprika, garlic powder, salt and pepper go on.
Smoked paprika
Smoked paprika gives the chicken its warm color and a gentle smoky flavor without needing a grill. Sprinkle it on with the rest of the seasonings after the butter.
Let’s make it
Choose your servings, then check things off as you go.
Original recipe: Serves 6. Original quantities shown.
Check ingredients as you prepare them. These checks stay on this page.
How to make it
0 of 6 steps completeMake room for Baked Chicken Legs (Crispy, Easy Recipe)
Review ingredients in your pantry before anything is added. Meal plans use your household size; grocery-only additions use the servings selected above.
The last little job
The last little job
Let the chicken rest for 5 minutes before serving. If the skin still isn't as crisp as you'd like, give the drumsticks a couple of minutes under the broiler first, then rest them.
A little more help as you go
Foil keeps cleanup simple
The foil-lined rimmed baking sheet catches drips while the rack holds the chicken above them. It keeps the setup tidy and still lets the drumsticks roast properly.
Flip once, then finish by temperature
After the first bake, turn the drumsticks over and continue until they reach the stated internal temperature. The second stretch has a range because pieces don't always cook at the same pace.
A few questions you might have
Can I skip the rack?
The rack is part of what helps the chicken get crispy, since it lifts the drumsticks off the pan. If you use one, set it over the lined rimmed baking sheet before arranging the chicken.
Do I season before or after brushing with butter?
Brush the drumsticks with melted butter first, then add the smoked paprika, garlic powder, salt and pepper. The butter gives the seasoning something to stick to.
Why does the bake time have a range at the end?
After the first 25 minutes and the flip, the drumsticks bake until they reach 170 degrees F inside. The range gives them time to finish without relying only on the clock.
Should I broil them at the end?
Only if the skin isn't as crispy as you like. A couple of minutes under the broiler is an optional finishing step, so keep it for the drumsticks that need a little more color and crispness.
Why rest chicken legs before serving?
The recipe gives the chicken a 5-minute rest after baking. It is a short pause, but it keeps the finish from feeling rushed after the drumsticks come out of the oven.
Storage & reheating safety
For cooked, perishable leftovers, refrigerate within 2 hours (1 hour above 90°F), using shallow containers for prompt cooling. Keep the refrigerator at 40°F or below, use refrigerated leftovers within 3–4 days, and reheat hot leftovers to 165°F, checked with a food thermometer. Follow any shorter package limit.
These are general safety limits, not a tested storage or freezing recommendation for this particular dish. USDA leftovers guidance · Safe cooking temperatures
Recipe source: wholesomeyum.com. Ingredient names and quantities may be adapted for the pantry.
Preparation notes follow the recipe shown here.