Kitchen notes · a little help before you start
Ground Beef Pasta Skillet
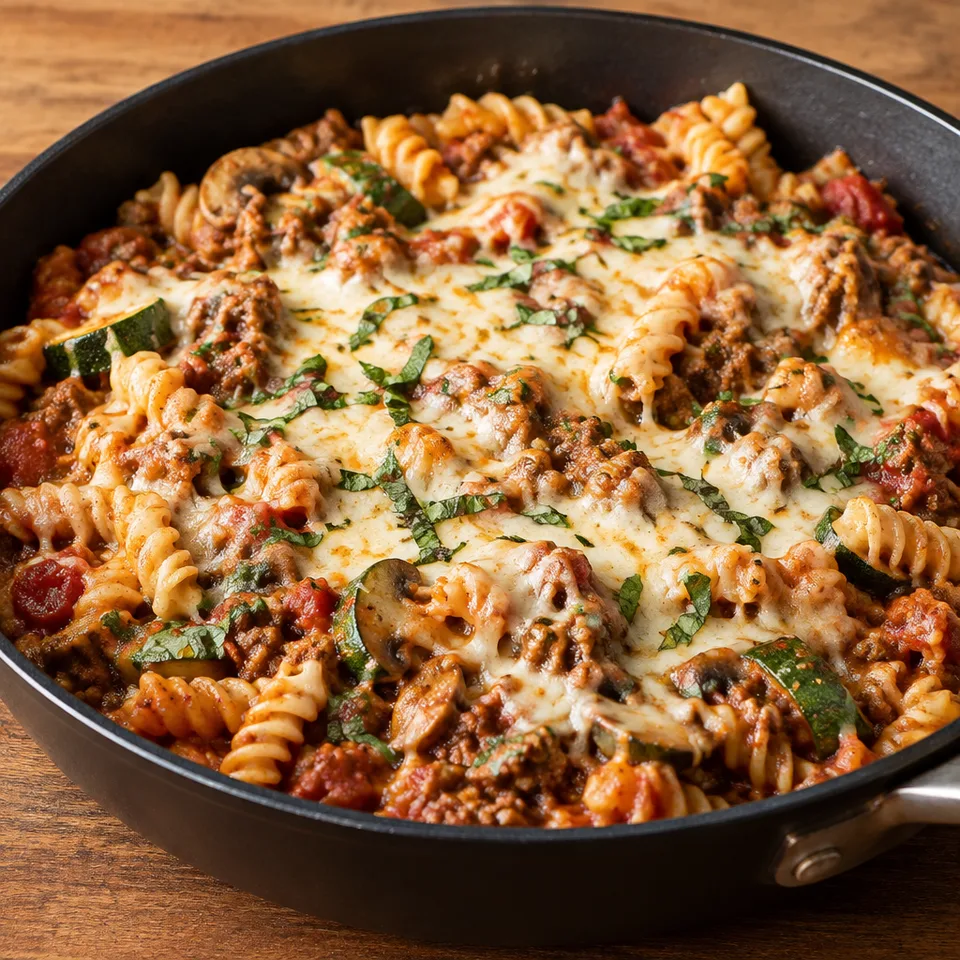
Melted cheese over beefy tomato pasta makes an inviting dinner, especially with fresh basil peeking through. There are tender vegetables tucked among the spirals, too. Scoop from beneath the cheesy top so the sauce and pasta make it onto your plate together.
- Prep
- 5 min
- Cook
- 25 min
- Total
- 30 min
- Original yield
- Serves 4
- Ingredients
- 16 listed
Make it part of your week
Recipe categories & planning details
- Meal type
- Main course
- Primary protein
- Beef
- Cuisine
- American · Italian
- Preparation & total time
- Prep: 15 minutes or less · Total: 30 minutes or less
- Dish type
- Pasta
A few quick notes
1. Use a roomy skillet
A 12-inch skillet gives the pasta enough space to sit in the sauce and cook evenly. Once the dry pasta goes in, stir well so the pieces are coated before you cover the pan.
2. Drain before the sauce goes in
After the beef is cooked, drain off as much grease as you can. That keeps the tomato sauce and broth from turning oily once everything simmers together.
3. Keep the simmer low
Once the skillet comes to a boil, turn the heat to LOW and cover it. The pasta needs a gentle simmer so it can cook through without the sauce reducing too quickly.
Get to know the ingredients
Lean ground beef works best here
Use 90% to 93% lean ground beef. You'll still drain the pan after cooking it, but starting lean helps keep the finished skillet saucy rather than greasy.
Add the pasta dry
The pasta goes into the skillet uncooked, right with the tomatoes, sauce, broth, and mushrooms. Fusilli or penne are good shapes because they hold onto the sauce as they simmer.
Save the basil for the end
Fresh basil is stirred in after the pasta is tender, just before the cheese. Adding it at the end keeps its flavor brighter in the finished skillet.
Let’s make it
Choose your servings, then check things off as you go.
Original recipe: Serves 4. Original quantities shown.
Check ingredients as you prepare them. These checks stay on this page.
How to make it
0 of 3 steps completeMake room for Ground Beef Pasta Skillet
Review ingredients in your pantry before anything is added. Meal plans use your household size; grocery-only additions use the servings selected above.
The last little job
Melt the cheese gently
After the basil goes in, scatter the mozzarella and Parmesan over the top and cover the skillet just until melted. If you use the broiler instead, it only needs a minute or two.
A little more help as you go
Doubling it
The recipe makes 4 hearty servings. If you're doubling it, use a Dutch oven instead of the skillet so the pasta and sauce have enough room to cook together.
Check the pasta before finishing
The covered simmer is done when the pasta is al dente. Give it a stir and check a piece before adding the basil and cheese, since the finish happens quickly after that.
A few questions you might have
Do I cook the pasta before adding it to the skillet?
No. Add the pasta dry after the tomatoes, tomato sauce, broth, and mushrooms go in. It cooks right in the covered skillet while the sauce simmers.
When do the mushrooms go in?
Add the chopped mushrooms with the diced tomatoes, tomato sauce, beef broth, and dry pasta. They simmer with the pasta rather than cooking with the onion and zucchini at the start.
Can I melt the cheese under the broiler?
Yes, if your skillet can go in the oven. Set the oven to BROIL and place the skillet in for a minute or two, just until the mozzarella and Parmesan have melted.
Why cook the onion and zucchini before adding the beef?
They get a short head start so the onion softens a little and the zucchini turns fork tender. Then the beef goes in and cooks with those vegetables already started.
Should I season the beef before or after draining?
Season it after you've drained the grease and returned the pan to the heat. That way the Italian seasoning, salt, and pepper stay in the skillet instead of leaving with the drippings.
Any more cooking tips?
This recipe makes 4 hearty servings. The recipe can be doubled and prepared in Dutch oven to serve 8 or more.
Storage & reheating safety
For cooked, perishable leftovers, refrigerate within 2 hours (1 hour above 90°F), using shallow containers for prompt cooling. Keep the refrigerator at 40°F or below, use refrigerated leftovers within 3–4 days, and reheat hot leftovers to 165°F, checked with a food thermometer. Follow any shorter package limit.
These are general safety limits, not a tested storage or freezing recommendation for this particular dish. USDA leftovers guidance · Safe cooking temperatures
Recipe source: fromvalerieskitchen.com. Ingredient names and quantities may be adapted for the pantry.
Preparation notes follow the recipe shown here.