Kitchen notes · a little help before you start
Lipsmacking Jambalaya
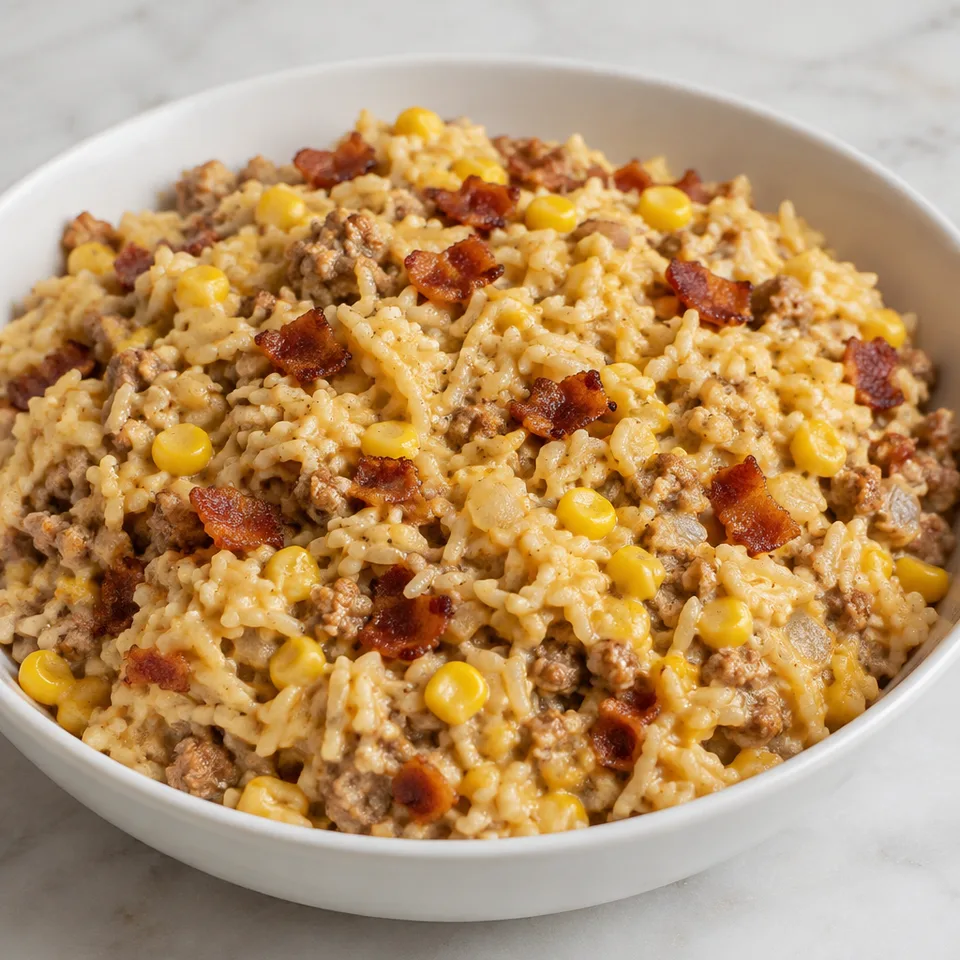
Creamy cheese rice and seasoned turkey make this skillet rich and filling, with sweet corn tucked throughout. Bits of bacon bring a salty, savory bite among the softer ingredients, and the onion and garlic give the whole dish warmth.
- Prep
- 10 min
- Cook
- 20 min
- Total
- 30 min
- Original yield
- Serves 6
- Ingredients
- 10 listed
Make it part of your week
Recipe categories & planning details
- Meal type
- Main course · Sides
- Primary protein
- Pork · Turkey
- Cuisine
- American
- Preparation & total time
- Prep: 15 minutes or less · Total: 30 minutes or less
- Dish type
- Rice dishes
A few quick notes
1. Cook the rice first
The Rice-A-Roni needs to be cooked before it goes into the skillet. Once the turkey mixture is ready, you’re just stirring the creamy rice through to bring everything together.
2. Keep the garlic moving
Pressed garlic can catch fast in a hot skillet. Stir it constantly during its short sauté so it flavors the turkey and onion without scorching.
3. Drain the corn as best you can
Cream-style corn won’t drain like regular kernels, and that’s expected here. Tip off what liquid you can, then add it to the pan and let it cook briefly.
Get to know the ingredients
Ground turkey
Break the turkey up with a spatula while it sautés so the seasoning works through the meat and you don’t end up with large clumps in the finished rice.
Creamy four cheese Rice-A-Roni
Use the creamy four cheese box called for here, and cook it according to the package before adding it to the skillet. It’s part of the creamy finish, not raw rice for simmering.
Bacon
The bacon is cooked separately, drained on paper towels, then chopped small. That keeps the pieces ready to stir in without bringing extra bacon fat into the skillet.
Let’s make it
Choose your servings, then check things off as you go.
Original recipe: Serves 6. Original quantities shown.
Check ingredients as you prepare them. These checks stay on this page.
How to make it
0 of 8 steps completeMake room for Lipsmacking Jambalaya
Review ingredients in your pantry before anything is added. Meal plans use your household size; grocery-only additions use the servings selected above.
The last little job
Loosen it if needed
After the cooked Rice-A-Roni goes in, check the texture. If the mixture seems dry, stir in a few tablespoons of hot water until it looks creamy again.
A little more help as you go
Let the onion soften
Give the onion its full few minutes after the turkey is cooked. It should soften before the garlic goes in, since the garlic only gets a quick cook while you stir.
Use the heat in the recipe
The skillet starts over medium-high heat for the turkey, then the add-ins cook quickly from there. Stir as directed so the mixture cooks evenly and nothing delicate sits too long against the pan.
A few questions you might have
Does the Rice-A-Roni go in dry or cooked?
Cooked. Make the Rice-A-Roni according to the package first, then stir it into the skillet at the end.
Should the onion go in before the turkey is fully cooked?
No. Cook the turkey through first while breaking it up, then add the onion and sauté until it’s soft.
Why add the garlic after the onion?
The onion needs a few minutes to soften, but pressed garlic only cooks for a short time while you stir constantly. Adding it later helps keep it from burning.
How much liquid should I drain from the cream-style corn?
Just drain it the best you can. Cream-style corn is hard to drain completely, so don’t worry if some liquid goes into the skillet.
What should I do if the finished skillet looks dry?
If it needs loosening, stir in a few tablespoons of hot water after adding the cooked Rice-A-Roni.
Storage & reheating safety
For cooked, perishable leftovers, refrigerate within 2 hours (1 hour above 90°F), using shallow containers for prompt cooling. Keep the refrigerator at 40°F or below, use refrigerated leftovers within 3–4 days, and reheat hot leftovers to 165°F, checked with a food thermometer. Follow any shorter package limit.
These are general safety limits, not a tested storage or freezing recommendation for this particular dish. USDA leftovers guidance · Safe cooking temperatures
Recipe source: natashaskitchen.com. Ingredient names and quantities may be adapted for the pantry.
Preparation notes follow the recipe shown here.