Kitchen notes · a little help before you start
Instant Pot Pork Loin
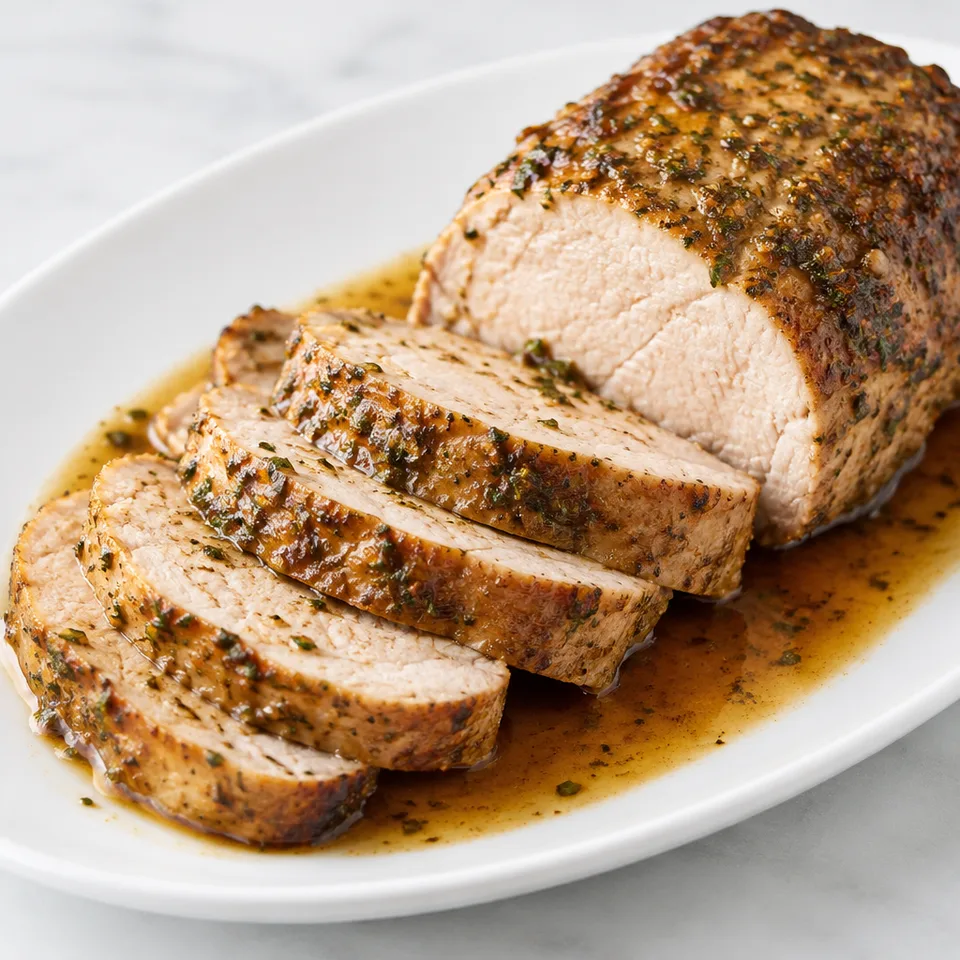
Pork loin with a glossy spoonful of pan juices makes dinner feel generous. Garlic and thyme give the meat a savory warmth, with lemon zest brightening the buttery coating. Slice it at the table so everyone gets some of that sauce along with their pork.
- Prep
- 10 min
- Cook
- 30 min
- Total
- 55 min
- Original yield
- Serves 6
- Ingredients
- 12 listed
Make it part of your week
Recipe categories & planning details
- Meal type
- Dinner
- Primary protein
- Pork
- Cuisine
- American
- Cooking method
- Pressure cooker
- Preparation & total time
- Prep: 15 minutes or less · Total: 31–60 minutes
A few quick notes
1. Give the pork a short head start
Take the roast out of the fridge before you begin. That short rest on the counter helps it shake off the chill before the seasoning, searing, and pressure cooking happen.
2. Brown all sides before pressure cooking
The sear is where a lot of the flavor starts. Let the oil get hot, then turn the pork as each side browns instead of rushing it straight to the trivet.
3. Keep the liquid in the pot
After cooking, don’t pour off the liquid. It becomes the pan sauce, and it also carries the browned bits you scraped up after searing.
Get to know the ingredients
Use pork loin, not tenderloin
Use the boneless pork loin roast specified for this pressure-cooker recipe.
Melt the butter first
The butter gets whisked with the garlic, sugar, soy sauce, zest, and herbs, so it needs to be melted before mixing. That makes it easy to brush over the roast.
Choose your deglazing liquid
Chicken broth is listed, but wine, beer, or water can be used for the same deglazing step. Whatever you use, scrape the bottom well before pressure cooking.
Let’s make it
Choose your servings, then check things off as you go.
Original recipe: Serves 6. Original quantities shown.
Check ingredients as you prepare them. These checks stay on this page.
How to make it
0 of 9 steps completeMake room for Instant Pot Pork Loin
Review ingredients in your pantry before anything is added. Meal plans use your household size; grocery-only additions use the servings selected above.
The last little job
Reduce, slice, and spoon over the juices
While the pork rests, boil the pot liquid until it reduces by half. Slice the rested roast, then serve it with those pan juices so none of that garlicky, savory liquid gets left behind.
A little more help as you go
Check the temperature before slicing
After the natural release, the pork should read 145˚F. If it’s short of that, put the lid back on and let the carryover heat finish it for a few minutes.
Let the rest do its job
Give the pork the full rest on the cutting board before slicing to help keep the juices in the meat.
A few questions you might have
Do I brush on the butter mixture before or after searing?
Brush it on before searing. The pork is seasoned with salt and pepper first, then coated with the butter mixture, then browned in the Instant Pot.
What should I do if the bottom of the pot has browned bits stuck to it?
Add the broth, wine, beer, or water and scrape those bits up before pressure cooking. They belong in the cooking liquid and later in the pan sauce.
Why does the pork go on a trivet?
After deglazing, the trivet keeps the pork lifted above the liquid while it pressure cooks. The liquid stays in the pot for steam and for the sauce afterward.
Can I skip the natural release?
Follow the natural release here. The recipe gives the pork 15 minutes of natural pressure release before quick-releasing what’s left, then checking the internal temperature.
What if the pork is under 145˚F when I open the lid?
Put the lid back on and let the carryover heat finish it. It shouldn’t take more than 2 to 3 minutes.
Storage & reheating safety
For cooked, perishable leftovers, refrigerate within 2 hours (1 hour above 90°F), using shallow containers for prompt cooling. Keep the refrigerator at 40°F or below, use refrigerated leftovers within 3–4 days, and reheat hot leftovers to 165°F, checked with a food thermometer. Follow any shorter package limit.
These are general safety limits, not a tested storage or freezing recommendation for this particular dish. USDA leftovers guidance · Safe cooking temperatures
Recipe source: diethood.com. Ingredient names and quantities may be adapted for the pantry.
Preparation notes follow the recipe shown here.