Kitchen notes · a little help before you start
How to Cook Acorn Squash
Acorn squash is worth getting to know if you enjoy food you can eat with a spoon straight from its own soft center. Butter and a little seasoning are plenty here. Go for the optional brown sugar if a sweeter bite is what you're in the mood for.
- Prep
- 10 min
- Cook
- 45 min
- Total
- 55 min
- Original yield
- Serves 4
- Ingredients
- 5 listed
Make it part of your week
Recipe categories & planning details
- Meal type
- Lunch
- Cuisine
- American
- Cooking method
- Roasting · Baked & roasted
- Preparation & total time
- Prep: 15 minutes or less · Total: 31–60 minutes
A few quick notes
1. Cut it steadily
Acorn squash can be awkward because of its ridges, so take your time when halving it. Once it's open, a large spoon is the right tool for scraping out the seeds and stringy pulp.
2. Keep the cut side up
Set the squash halves flesh side up in the pan before seasoning. That little hollow holds the butter and seasoning where you want them while the squash roasts.
3. Look for tenderness
The squash is done when it's golden and tender. The timing gives you a window, so use the texture as your final check before pulling it from the oven.
Get to know the ingredients
Acorn squash
You’re roasting the squash in halves, not peeling or cubing it first. After the seeds and pulp are scooped out, the flesh roasts right in its shell until tender.
Butter
Rub the butter over the cut flesh before roasting. It helps the seasoning stick and gives the surface a simple, savory richness as the squash turns golden.
Brown sugar
The brown sugar is optional, so use it only if you want the squash to lean sweeter. Sprinkle it on with the salt and pepper before it goes into the oven.
Let’s make it
Choose your servings, then check things off as you go.
Original recipe: Serves 4. Original quantities shown.
Check ingredients as you prepare them. These checks stay on this page.
How to make it
0 of 5 steps completeMake room for How to Cook Acorn Squash
Review ingredients in your pantry before anything is added. Meal plans use your household size; grocery-only additions use the servings selected above.
The last little job
The last little job
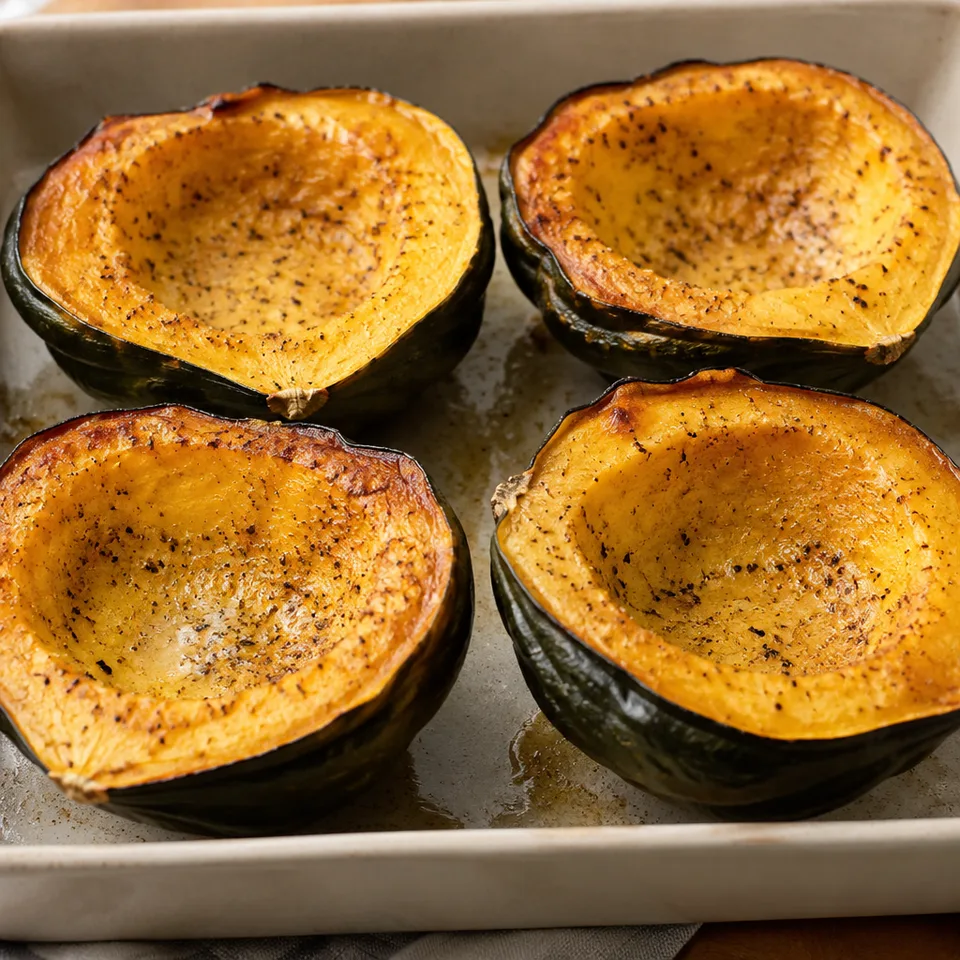
Roast the squash uncovered until the flesh is golden and tender. Once it reaches that point, it’s ready to serve straight from the halves, with the buttery seasoning gathered in the center.
A little more help as you go
A little help before you start
Preheat the oven before you cut and season the squash. The prep is simple, and having the oven ready means the buttered halves can go straight in once they’re in the pan.
Season the flesh
Aim the salt, pepper, and optional brown sugar at the cut sides rather than the outer skin. That’s the part you’ll eat, and it’s where the seasoning can melt in as it roasts.
A few questions you might have
Do I roast acorn squash cut side up or down for this recipe?
Cut side up. The squash sits in a shallow baking pan with the flesh facing up, then roasts uncovered that way until golden and tender.
Do I need to remove the skin before roasting?
No. The squash is halved, seeded, and roasted in its shell. The recipe doesn’t call for peeling it first.
What exactly should I scoop out?
Scoop out the seeds and the soft, stringy pulp from the center of each squash half. A large spoon is the tool called for here.
Is the brown sugar required?
No, it’s optional. Add it before roasting if you want a sweeter squash, or leave it out and season with just butter, salt, and pepper.
How can I tell when the squash is done?
It should be golden and tender after roasting uncovered. If the flesh is still firm, it needs more time within the recipe’s roasting window.
Any more cooking tips?
For a sweeter version, sprinkle squash with brown sugar before roasting.
Storage & reheating safety
For cooked, perishable leftovers, refrigerate within 2 hours (1 hour above 90°F), using shallow containers for prompt cooling. Keep the refrigerator at 40°F or below, use refrigerated leftovers within 3–4 days, and reheat hot leftovers to 165°F, checked with a food thermometer. Follow any shorter package limit.
These are general safety limits, not a tested storage or freezing recommendation for this particular dish. USDA leftovers guidance · Safe cooking temperatures
Recipe source: spendwithpennies.com. Ingredient names and quantities may be adapted for the pantry.
Preparation notes follow the recipe shown here.